

Your expensive mold has a crack or chip. The cost of downtime and replacement looms large. You need a fast, precise repair solution that will not damage the mold further.
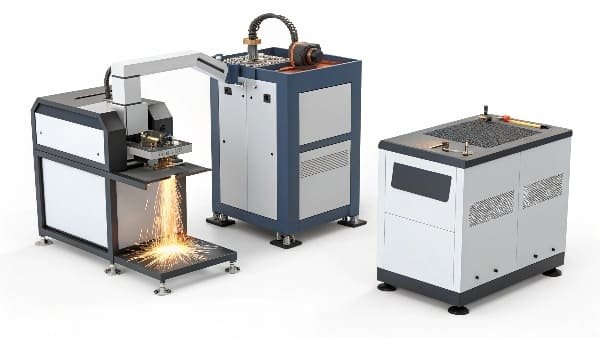
For high-precision mold repairs, a pulse laser welder1 (YAG or fiber) is best for fine details. For larger defects or build-up, a continuous fiber laser2 with a wobble head offers greater efficiency. The key is matching the laser technology to your specific repair application and material.

Choosing the right machine can feel overwhelming. I remember helping a customer, Meherzi, who manages procurement for a plastic injection molding company. He worried that buying the wrong machine would be a costly mistake, leading to poor repairs and even more downtime. He needed clear, practical advice to make a confident decision. Let's break down the options so you can choose the perfect tool for your workshop.
Which type of welding machine is best for mold repair?
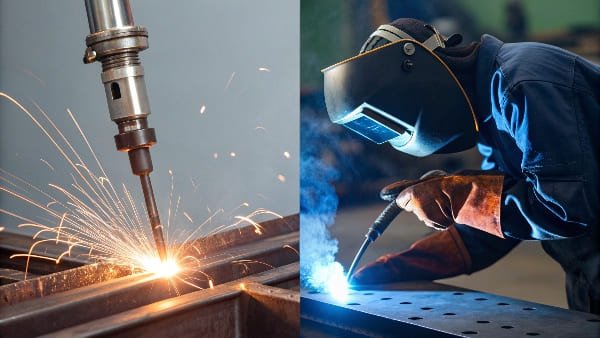
Struggling with mold repairs? Traditional TIG welding3 adds too much heat, causing warping and softening. This makes achieving a perfect finish difficult and time-consuming, hurting your production schedule.
Laser welding is superior for most mold repairs. It creates a stronger metallurgical bond4 with a tiny heat-affected zone (HAZ)5. This means minimal distortion and a better surface finish, dramatically reducing post-processing time for polishing or texturing. It’s the modern solution for high-quality, fast repairs.
In my years in this industry, I have seen many companies switch from TIG to laser welding. The biggest reason is control. Traditional methods like TIG or arc welding are powerful, but they are like using a hammer when you need a scalpel. They flood the mold with heat. This can soften the surrounding steel, changing its properties. Repairing a hairline crack can end up warping the entire mold insert. Laser welding, on the other hand, is incredibly focused. It delivers precise energy exactly where you need it. This preserves the integrity of the mold and makes the final finishing steps much easier.
Laser Welding vs. Traditional Methods
| Feature | Laser Welding | TIG (Argon Arc) Welding | Other Methods (Brazing, etc.) |
|---|---|---|---|
| Heat Input | Very Low | High | High |
| Deformation | Minimal | Significant | Significant |
| Precision | Excellent | Good | Fair |
| Post-Processing | Minimal (Easy to polish/texture) | Extensive (Grinding, polishing) | Variable, often difficult |
| Best For | High-precision, heat-sensitive molds | Large, less critical repairs | Joining, not high-strength repair |
How do you choose the right laser welding system?
You know a laser welder is the right choice, but which one? Picking between pulse, continuous, YAG, or fiber lasers can be confusing. Making the wrong choice could mean a machine that's ill-suited for your jobs.
Start by analyzing your main repair tasks. For tiny cracks and edges, a pulse laser with a microscope workstation is your best bet. For filling larger areas or building up worn surfaces, a handheld continuous fiber laser2 with a wobble head provides the necessary speed and power.
When a client asks me for help choosing, I always start with their molds. What are you making? Danang, a customer from Indonesia who makes EVA midsoles, needed a versatile machine. He had to repair both small defects on precision molds and build up larger worn areas. We looked at a system that offered both pulse and continuous modes. For most people, however, one specific type is a better investment. To find the right fit, you need to look at the laser source and the workstation Features.
Key Laser Types for Mold Repair
- Pulse Nd:YAG Laser: The classic workhorse. It offers great control over pulse energy for delicate repairs. It requires more maintenance than fiber lasers but is a proven technology.
- Pulse Fiber Laser: This is quickly replacing YAG. It’s more stable, energy-efficient, and requires less maintenance. It's perfect for fine wire welding from 0.2mm to 1.2mm.
- Continuous Fiber Laser + Wobble Head6: Think power and efficiency. The wobble head spreads the laser beam, creating a wider, smoother weld pool. It's ideal for larger repairs and can often be used with a handheld gun for flexibility.
- Laser Metal Deposition (LMD)7: This is for advanced applications. It adds material layer by layer to rebuild features or apply hard-facing coatings for wear resistance.
Essential Workstation Features
| Component | Recommendation | Why It's Important |
|---|---|---|
| Work Table | 3-5 axis CNC table8 | Allows precise positioning of complex mold shapes. |
| Viewing System | Microscope or coaxial CCD camera9 | Essential for viewing the repair area and placing the weld spot accurately. |
| Focusing Lens10 | Multiple lenses (100-200mm) | Different focal lengths are needed for different repair depths and access. |
| Wire Feeder11 | Supports 0.2-1.2mm wire | Critical for adding filler material12. Must have stable start/stop control. |
| Preheating13 | Heating plate or induction system | Many tool steels require preheating to prevent cracking during welding. |
Is repairing a mold with a laser welder easy?
You see the flawless results of laser welding and think it must be a simple point-and-click process. But a poor strategy can lead to cracks, pores, or an uneven surface, ruining the repair.
The technique is more important than the machine alone. A successful repair depends on a methodical process of cleaning, preheating, layered welding, and slow cooling. While modern machines are user-friendly, the operator's skill in applying the right strategy is what ensures a perfect result.
Becoming an expert takes practice, but the core process is straightforward and learnable. I always tell new users that patience is their most important tool. You can't rush a quality repair. It's a systematic process that respects the properties of the steel. You are not just melting metal; you are performing micro-surgery on a critical tool. Each step, from cleaning the oil off the surface to covering the mold in a thermal blanket for slow cooling, plays a vital role in the final outcome. Skipping a step to save time will almost always cost you more time in the end when you have to fix the fix.
The 6 Steps to a Perfect Mold Repair
- Preparation: First, thoroughly clean the repair area to remove all oil, rust, and oxides. If you are fixing a crack, drill a small "stop hole" at each end to prevent it from spreading further during welding.
- Grooving: Use a grinder to cut a V-shaped or U-shaped groove along the crack or defect. This creates a clean channel for the new filler material12 to bond with the parent metal.
- Preheating13: Gently preheat the mold to the recommended temperature for the specific steel type (usually 150-300°C). This prevents thermal shock and reduces the risk of cracking.
- Welding: Apply the filler material in thin layers (0.2-0.6mm each). Overlap each pass slightly. This controlled, multi-pass approach minimizes stress buildup in the material. Use high-purity argon gas to shield the weld from oxygen.
- Cooling: After welding, allow the mold to cool down very slowly. You can cover it with a ceramic wool blanket or place it in a furnace to control the cooling rate14. This prevents brittleness.
- Post-treatment: Once cool, perform a post-weld heat treatment (tempering) to relieve stress and restore the desired hardness. Finally, the repaired area can be machined and polished back to its original dimensions.
What power level do you need for a mold repair welder?
You see welding machines advertised with big power numbers. It is tempting to think more power is always better, but for mold repair, the wrong power setting is a recipe for disaster.
For laser welding, "power" isn't a single number. For pulse lasers, you control single pulse energy (Joules) and frequency (Hz). For continuous lasers, you control power (Watts). The right setting depends entirely on the material, the type of repair, and the wire size being used.
The concept of "amps"from arc welding doesn't directly translate to lasers. Instead, we talk about energy and power. I once worked with a client who kept burning through thin mold features because he set his laser's energy too high. He thought more power meant a stronger weld. I explained that for mold repair, finesse is more important than force. For a common tool steel like H13, you might use very low energy pulses for a fine crack, but switch to a higher power continuous beam with a wobble motion for filling a larger gauge. The key is to use just enough energy to create a perfect metallurgical bond4 without damaging the surrounding area.
Example Parameter Windows
The parameters below are just starting points. You must always test your settings on a scrap piece of the same material before working on the actual mold.
For H13 Tool Steel (Hot Work, 48-52 HRC)
- Preheat: 200–300°C
- Filler Wire: H13 composition
- Pulse Laser Settings:
- Pulse Energy: 5–20 Joules
- Frequency: 10–60 Hz
- Spot Size: 0.3–0.8 mm
- Continuous Laser Settings (with wobble):
- Power: 0.8–1.5 kW
- Weld Speed: 300–800 mm/min
- Post-Weld: Temper at 520–560°C to restore hardness and relieve stress.
For P20 Tool Steel (Pre-Hardened, 28–34 HRC)
- Preheat: 120–200°C
- Filler Wire: P20 composition
- Pulse Laser Settings:
- Pulse Energy: 3–12 Joules
- Frequency: 10–80 Hz
- Spot Size: 0.4–1.0 mm
- Post-Weld: Stress relieve according to material supplier's data.
Conclusion
Choosing the right laser welder means matching the machine to your repair needs and material. The right process is just as important as the right tool for a durable, high-quality repair.
Explore this link to understand the technology behind pulse laser welders and their applications in precision repairs. ↩
Learn about the advantages of continuous fiber lasers, especially for larger repairs, and how they enhance efficiency. ↩
Discover why TIG welding may not be suitable for mold repairs and what alternatives exist. ↩
This link provides insights into metallurgical bonds and their importance in achieving strong welds. ↩
Understanding HAZ is crucial for ensuring minimal distortion during repairs; this resource explains its significance. ↩
Find out how this technology improves welding efficiency and quality for larger repairs. ↩
Discover advanced applications of LMD and how it can enhance mold repair processes. ↩
Learn about the importance of CNC tables in achieving precise positioning for complex mold shapes. ↩
Explore how these viewing systems enhance accuracy in laser welding repairs. ↩
Understanding the role of different focal lengths can help optimize your welding process. ↩
This resource explains the critical role of wire feeders in adding filler material during welding. ↩
Explore the different filler materials and their importance in achieving strong welds. ↩
Learn about the significance of preheating to prevent cracking and ensure successful welds. ↩
Understanding cooling rates can help you achieve better quality in your welds. ↩