

Tired of scrapping expensive molds from minor damage? Traditional welding causes too much distortion. You need a precise, low-heat solution to save time and money on repairs.
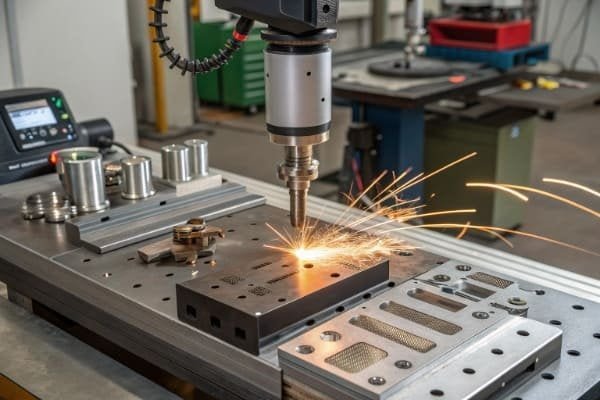
A laser welding machine1 uses a focused beam of light to melt and join metals with extreme precision. It's the top choice for repairing high-value injection2, die-cast, and stamping molds because it minimizes heat damage3, reduces distortion, and allows for a perfect, polishable finish.
When I started Fixon Laser, I saw many procurement managers like Danang and Meherzi face the same problem. They knew their workshops were losing money on mold repair4s but didn't have the technical background to choose the right solution. They worried about downtime, quality, and costs. I've spent years helping clients navigate these challenges, and I can tell you that understanding what these machines do is the first step to solving those problems. Let’s look at the real-world jobs a laser welder handles every day.
What problems can a laser welder actually fix?
Your workshop faces constant pressure to keep production running. A cracked or worn mold can bring everything to a halt. You need a reliable, fast repair method that works.
A laser welder handles critical and common mold repair tasks. This includes fixing fatigue cracks5, filling in accidental damage or machining errors, modifying designs, and adding wear-resistant layers6 to high-use areas. It is a versatile tool for both emergency repairs and planned maintenance.
When a client first asks me what a laser welder does, I don't just talk about the technology. I talk about the problems it solves on the factory floor. It's not just about welding; it's about saving a mold that might otherwise be scrapped. My clients in the footwear and plastics industries use these machines for very specific tasks that directly impact their bottom line.
Everyday Mold Repair Jobs
The real value of a laser welder is its versatility. It's the difference between a quick, in-house fix and a costly, time-consuming replacement. Here are the most common applications I see:
- Crack and Damage Repair: Molds develop cracks from heat and pressure, especially around sharp corners or gates. A laser welder can precisely fill these cracks. The same goes for accidental dings, scratches, or areas where too much material was removed during machining.
- Design Changes and Size Adjustments: Sometimes a design needs a small change after the mold is already made. You might need to adjust a parting line, change a draft angle, or add a little material. Laser welding lets you add metal exactly where it's needed without affecting the rest of the mold.
- Wear and Corrosion Resistance: Certain parts of a mold, like gates, slides, and ejector pin holes, wear out faster than others. Using laser cladding (a type of laser welding), you can apply a layer of harder, more durable material to these areas, extending the mold's life significantly.
This process turns a potential disaster into a routine fix, keeping production lines moving and saving thousands in costs.
How does laser welding compare to TIG or MIG welding?
You are familiar with TIG and MIG welding, but they often cause too much heat, warping your precise molds. You need a better process that protects your investment and ensures quality.
Laser welding is far superior to TIG for mold repair due to its extremely low heat input. This means minimal distortion, no softening of the surrounding metal, and a finish that can be polished to a mirror or textured surface. It offers precision that TIG cannot match7.

I often speak with procurement officers who are experts in sourcing but not in metallurgy. They ask me, "Cassie, our workshop uses TIG. Why should we switch?" This is a great question. The answer lies in the heat. Traditional welding floods the area with heat, which is its biggest weakness when working with high-precision tools like molds. Let's break down the key differences.
A Head-to-Head Comparison
The choice of welding method directly impacts the cost, downtime, and quality of your final product. For mold and die repair, the details matter immensely.
| Feature | Laser Welding | TIG Welding | The Impact for You |
|---|---|---|---|
| Heat Affected Zone (HAZ) | Extremely small, highly focused | Large and widespread | Less heat means no warping or distortion of your expensive mold. The surrounding steel keeps its hardness. |
| Precision | Pinpoint accuracy, perfect for fine details and sharp corners. | Good, but struggles with very small or delicate areas. | You can repair the smallest defects without damaging adjacent features. |
| Post-Weld Finishing | Smooth surface, requires minimal finishing, can be polished or textured. | Rougher bead, requires significant grinding and finishing. | Saves you hours of manual labor in grinding and polishing, and ensures a perfect texture match. |
| Material Compatibility | Excellent for specialty mold steels like H13, P20, S136, and NAK80. | Can be used, but the high heat risks changing the properties of these steels. | You can confidently repair high-performance molds without compromising their integrity or lifespan. |
While TIG is a great process for general fabrication, it's a risky choice for high-value molds. Laser welding was practically designed for this job, offering control and quality that older methods simply can't provide. It protects the mold, reduces labor, and delivers a superior result.
How do you choose the right laser welding setup?
You know you need a laser, but which one? Choosing between different laser types and workstation setups can be confusing. Making the wrong choice means wasting money and not getting the results you need.
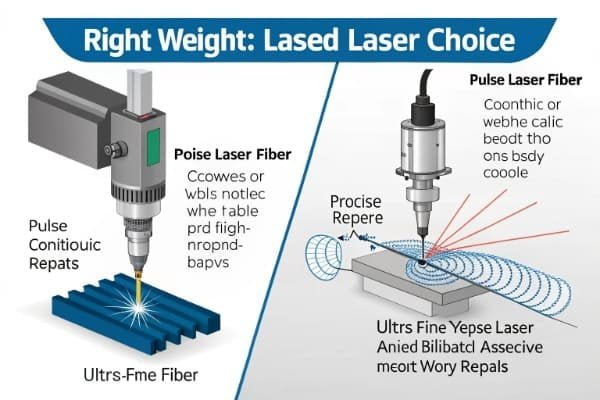
The right laser depends on your application. For ultra-fine, precise repairs, a pulse laser8 (YAG or Fiber) is best. For larger repairs or deep welds, a continuous wave fiber laser9 with a wobble head is more efficient. The key is matching the machine to your most common jobs.
Helping clients choose their first machine is one of the most important parts of my job. A buyer like Meherzi, who deals with complex plastic injection molds, has different needs than someone repairing large die-cast molds. It's not about buying the most powerful machine; it's about getting the right machine. Let's look at the main options and what they are good for.
Matching the Machine to the Mission
Your laser welding setup is more than just the laser source. It's a complete system that needs to be configured for your specific work.
Key Laser Types
- Pulse Lasers (Nd:YAG and Fiber): These are the kings of precision. They deliver energy in short pulses, which gives you incredible control over heat input. They are perfect for repairing tiny defects on molds that need a mirror-polish finish10. The trend is moving from older YAG lasers to more reliable and efficient Fiber lasers.
- Continuous Wave (CW) Fiber Lasers with Wobble Heads: These are the workhorses for bigger jobs. A CW laser delivers a constant beam of energy, and the "wobble" head moves the beam in a small, rapid circle. This creates a wider, smoother weld, making it faster for filling larger areas or joining thicker parts. Handheld versions offer great flexibility.
- Laser Metal Deposition (LMD)11: This is for advanced applications like adding a hard, wear-resistant coating or rebuilding a worn-out surface. It uses laser to melt metal powder or wire onto the surface, creating a new, metallurgically bonded layer with superior properties.
Essential Workstation Components
When I help a customer spec a machine, we look at the whole system:
- Work Table: A precise 3-axis (or even 5-axis) table is critical for positioning the mold accurately.
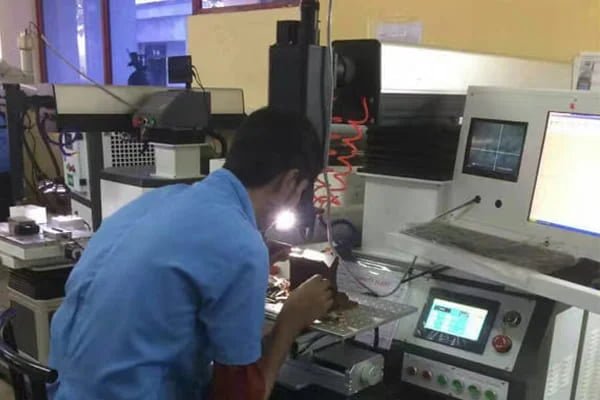
- Viewing System: A microscope or a camera with a screen (CCD) is essential for seeing exactly where you are welding.
- Gas Shielding: A nozzle that blows argon gas over the weld is non-negotiable. It protects the molten metal from the air, preventing defects.
- Pre-heating: For certain steels like H13, you need a small heating plate or induction coil to pre-heat the mold, which prevents cracking.
Thinking through these components ensures you get a machine that is not just a welder, but a complete repair solution.
What is the secret to a perfect laser weld?
Just buying a machine is not enough. Without the right process, you can still get bad results like cracks or weak spots. You need to know how to control the process to guarantee success.
The secret to a perfect laser weld is process control12. This means proper preparation (cleaning and grooving13), controlled heating and cooling (pre-heating and post-weld tempering), and using the right parameters (power, speed, and gas flow) for the specific material.
I've learned that technology is only half the battle. The other half is technique. The main advantage of laser welding is the incredible level of control it gives you. But you have to use that control correctly. I always provide my clients with starting parameters and a clear process checklist. It's this knowledge, combined with a good machine, that creates real value. Let's walk through the key steps for a successful repair.
A Step-by-Step Guide to Quality Control
Following a disciplined process is crucial. You can't skip steps. For a typical mold steel like H13 or P20, here is the professional approach that ensures a strong, flawless weld.
1. Preparation is Everything
- Clean: First, you must thoroughly clean the area to remove all oil, grease, and oxides. Any contamination will cause defects in the weld.
- Inspect and Groove: If you are repairing a crack, you must find its end points and drill a tiny "stop hole" to prevent it from growing. Then, use a small grinder to create a clean V-shaped or U-shaped groove along the crack. This ensures the laser can penetrate fully.
2. Temperature Management
- Pre-heat: Many high-carbon mold steels are brittle. Welding them cold will cause them to crack. You must pre-heat the mold to a specific temperature (e.g., 200–300°C for H13 steel). This makes the metal less brittle and ready for welding.
- Controlled Cooling: After welding, you cannot let the mold cool down quickly. You should wrap it in an insulating blanket or place it in a temperature-controlled oven to cool down slowly. This prevents new stress from forming.
3. Welding and Post-Treatment
- Layer by Layer: You don't fill the groove in one pass. You build it up with thin layers, each about 0.2-0.6 mm thick. This minimizes heat buildup and stress.
- Shielding Gas: Always use high-purity argon gas14 to shield the weld pool from oxygen. This is critical for a clean, strong weld.
- Post-Weld Heat Treatment (Tempering): After the weld has cooled, the part must be reheated to a specific temperature (e.g., 520-560°C for H13). This process is called tempering. It relieves all the stress from welding and restores the steel’s original hardness and toughness.
This methodical approach is the true advantage of laser welding. It’s what transforms a complicated metallurgical problem into a predictable, repeatable, and highly effective repair process.
Conclusion
Laser welding precisely repairs valuable molds with minimal heat, saving them from the scrap heap. It is a controlled, reliable process that cuts downtime and protects your most critical assets.
Explore this link to understand the technology behind laser welding machines and their applications. ↩
Learn how laser welding can save costs and improve the quality of high-value mold repairs. ↩
Find out effective techniques to reduce heat damage during welding and improve outcomes. ↩
Explore effective strategies for mold repair that leverage laser welding technology. ↩
Understand the nature of fatigue cracks and the best practices for repairing them. ↩
Explore the process of applying wear-resistant layers to extend the life of molds. ↩
Discover the precision advantages of laser welding compared to TIG welding. ↩
Learn about pulse lasers and how they enhance precision in welding applications. ↩
Find out how continuous wave fiber lasers are utilized for larger welding jobs. ↩
Find out the techniques that allow laser welding to produce a flawless finish. ↩
Explore the advanced applications of LMD in welding and surface repair. ↩
Learn about the importance of process control for achieving successful laser welds. ↩
Explore the essential steps of cleaning and grooving for effective welding. ↩
Learn how high-purity argon gas contributes to cleaner and stronger welds. ↩